🌸 A Craft Filled with Love
There’s something magical about butterflies — their bright colors and graceful wings always spark wonder in children. With this craft, kids can create their very own fluttery friends using just tissue paper, clothespins, and a dash of imagination. It’s a perfect project for rainy afternoons or spring-themed activities!
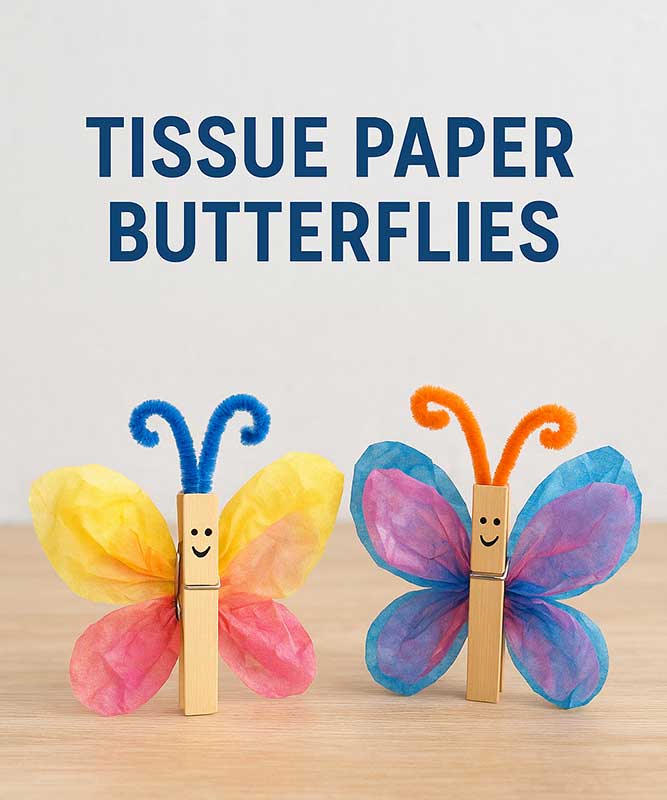
The Craft
You’ll need:
- Colorful tissue paper (various shades)
- Wooden clothespins
- Pipe cleaners (for antennae)
- Markers or crayons
- Glue and scissors
✂️ Step-by-Step Instructions
- Cut two pieces of tissue paper (one large, one small) for the butterfly wings.
- Pinch the center of both pieces and clip them together with a clothespin.
- Twist a small pipe cleaner on top to create curly antennae.
- Decorate the wings with markers, stickers, or glitter glue for a special touch!
🌟 Interactive Moment
Ask your child to mix and match colors to design their butterfly. What happens when you layer two colors of tissue paper? Encourage them to name their butterflies or create a “butterfly garden” display on the wall.
🌱 Educational Benefits
- 🌈 Fine motor skills: Folding, pinching, and gluing strengthen hand-eye coordination.
- 🎨 Creativity and design: Kids experiment with color combinations and patterns.
- 🦋 Science connection: Introduces the concept of metamorphosis and symmetry in nature.
🎉 Wrap-Up
From simple tissue to stunning butterflies, this craft teaches kids that creativity can transform anything. Plus, these little creations make adorable decorations or heartfelt handmade gifts!For more creative kids’ activities, visit Little Mandu’s Crafts Corner.
Post Views: 21